Introduction to Dry Aging
What Is Dry Aging?
Dry aging is a traditional method of enhancing the flavor and texture of meat, primarily beef, by allowing it to age in a controlled environment. During this process, large cuts of meat are stored at a precise temperature, humidity, and airflow for an extended period, typically ranging from 14 to 45 days or longer. This controlled aging promotes enzymatic and microbial activity, which breaks down the meat’s proteins, fats, and connective tissue, resulting in a tender and intensely flavored product.
How Dry Aging Enhances Flavor and Texture
- Flavor Development:
- Dry aging concentrates the natural beefy flavor by reducing the water content in the meat.
- Over time, it develops rich, nutty, and umami undertones, giving the meat a distinct taste profile.
- Improved Tenderness:
- Natural enzymes break down muscle fibers, resulting in a softer, more tender texture.
- Crust Formation:
- The outer layer of the meat forms a protective crust during the aging process, which is later trimmed, leaving the interior beautifully aged.
These changes make dry-aged meat a premium choice for steak lovers and culinary enthusiasts.
Why Dry Aging Is Worth the Effort
Dry aging requires time, precision, and care, but the results are unparalleled:
- Unmatched Flavor: The unique depth and complexity of dry-aged meat are unlike anything found in fresh cuts.
- Superior Texture: The enhanced tenderness makes each bite melt in your mouth.
- Culinary Prestige: Dry-aged beef is often considered a luxury and is a hallmark of gourmet dining experiences.
Although dry aging takes patience and dedication, the payoff in quality, taste, and dining experience is well worth the effort. Whether at home or in a restaurant, dry-aged meat delivers a truly elevated culinary delight.
The Science Behind Dry Aging
The Role of Enzymes in Tenderizing Steak
During the dry aging process, natural enzymes present in the meat break down muscle fibers and connective tissue, which results in:
- Enhanced Tenderness: Proteins are converted into amino acids, softening the meat’s structure.
- Flavor Development: Fat and connective tissue degradation contribute to the rich, buttery texture characteristic of dry-aged steak.
These enzymatic reactions transform tough cuts into tender, premium-quality meat.
How Moisture Loss Intensifies Flavor
One of the key outcomes of dry aging is the reduction of water content in the meat:
- Concentration of Flavors: As moisture evaporates, the remaining meat becomes more densely packed with proteins and fats, amplifying its beefy taste.
- Nutrient Retention: While moisture decreases, nutrients and flavor compounds become more pronounced.
- Crust Development: The exterior layer forms a dry, protective crust, which is trimmed away before cooking.
This process creates the bold, complex flavors that set dry-aged meat apart from fresh cuts.
The Importance of Controlled Temperature and Humidity
Precise control over the environment is crucial for successful dry aging:
- Temperature:
- Optimal range: 34°F to 38°F (1°C to 3°C).
- Prevents spoilage while allowing enzymatic activity.
- Humidity:
- Ideal level: 80–85%.
- Maintains moisture balance to prevent excessive drying and mold growth.
- Airflow:
- Ensures consistent evaporation of moisture and prevents bacterial growth.
These conditions create the perfect balance for developing the tender texture and bold flavors characteristic of dry-aged meat. The science of dry aging ensures that every step contributes to a superior culinary experience.
Tools and Equipment Needed for Dry Aging
Specialized Dry Aging Fridges vs. DIY Setups
- Specialized Dry Aging Fridges:
- Purpose-Built Units: Designed specifically for dry aging, these fridges maintain precise temperature, humidity, and airflow.
- Advantages:
- Professional-grade results.
- Consistent conditions minimize risks of spoilage.
- Best For: Serious enthusiasts or commercial use.
- DIY Setups:
- Standard Refrigerator with Modifications:
- Use a dedicated fridge to avoid contamination from other foods.
- Add a humidity control device and a fan for proper airflow.
- Pros:
- Cost-effective alternative.
- Customizable for home use.
- Cons:
- Requires monitoring and maintenance to ensure consistent conditions.
- Standard Refrigerator with Modifications:
Essential Tools for a Successful Dry Aging Process
- Temperature and Humidity Control:
- Digital Thermometer: For accurate monitoring of fridge temperature.
- Hygrometer: Measures humidity levels to maintain an optimal range.
- Airflow Management:
- Small Fans: Ensure even airflow around the meat.
- Meat Storage:
- Wire Racks: Elevate the meat to allow air circulation on all sides.
- Drip Trays: Collect any liquid to maintain cleanliness.
- Protective Materials:
- Cheesecloth or Butcher Paper: Wrap the meat loosely to allow breathing while preventing contamination.
- Trimming Tools:
- Sharp Knives: Essential for trimming the dry outer crust after aging.
- Cutting Board: Durable and large enough to handle aged cuts.
Choosing the Right Cuts of Meat
- Ideal Cuts for Dry Aging:
- Bone-In Ribeye: Retains moisture and flavor during the aging process.
- Strip Loin: Perfect for achieving a rich, beefy flavor.
- Tenderloin: Benefits from enhanced tenderness and subtle flavor concentration.
- Thickness:
- Choose cuts at least 2 inches thick to prevent excessive drying and to withstand the trimming process.
- Fat Content:
- Well-marbled cuts are ideal, as the fat contributes to both flavor and texture development.
Investing in the right tools and selecting suitable cuts of meat are critical to achieving a successful dry aging process, whether you’re using a specialized fridge or a DIY setup.
Step-by-Step Guide to Dry Aging Steak at Home
Selecting the Right Cut for Dry Aging
- Choose the Best Cuts:
- Opt for bone-in cuts like ribeye or strip loin for stability during aging.
- Ensure the meat has ample marbling to retain flavor and tenderness.
- Thickness Matters:
- Select cuts that are at least 2 inches thick to prevent excessive moisture loss.
- Freshness Is Key:
- Use freshly butchered meat to ensure optimal aging conditions and avoid pre-trimmed cuts.
Preparing Your Setup (Refrigerator or Dry Aging Bag)
- Specialized Fridge:
- Set the temperature to 34°F–38°F (1°C–3°C) and humidity to 80%–85%.
- Place a small fan inside for consistent airflow.
- DIY Refrigerator:
- Dedicate a spare fridge for dry aging to avoid contamination from other foods.
- Add a hygrometer and thermometer to monitor humidity and temperature.
- Dry Aging Bags:
- Use vacuum-sealable dry aging bags for easier management.
- Place the bagged steak on a wire rack to allow airflow.
Storing the Steak in Optimal Conditions
- Position the Meat:
- Place the steak on a wire rack inside the fridge or bag.
- Ensure there’s space for air to circulate around the steak.
- Use Drip Trays:
- Set a tray beneath the rack to catch any liquid and keep the setup clean.
- Avoid Overcrowding:
- Dry age only one or two cuts at a time to maintain consistent airflow.
Monitoring the Process (Time and Temperature)
- Daily Checks:
- Monitor the temperature (34°F–38°F) and humidity (80%–85%) daily with a thermometer and hygrometer.
- Aging Timeline:
- 14 Days: Initial tenderization and mild flavor development.
- 21 Days: Noticeable enhancement in flavor and tenderness.
- 30+ Days: Bold, nutty, and complex flavors emerge.
- Inspect the Meat:
- Look for a darkened, dry crust forming on the outside (a natural part of the aging process).
Trimming and Preparing the Aged Steak
- Trimming the Crust:
- Use a sharp knife to remove the dry, outer crust and any tough fat or discolored areas.
- Trim carefully to preserve the interior meat.
- Portioning:
- Slice the aged meat into steaks of your desired thickness.
- Preparing for Cooking:
- Season simply with salt and pepper to let the aged flavor shine.
- Cook using high-heat methods like grilling, broiling, or pan-searing to develop a crust while preserving the tender interior.
By following these steps, you can successfully dry age steak at home and enjoy the rich, tender, and flavorful results that rival those from a premium steakhouse.
Benefits of Dry Aging Steak
Enhanced Flavor Profile
- Concentration of Flavors:
- As the steak loses moisture during dry aging, its natural flavors become more concentrated, resulting in a rich, beefy taste.
- Complexity:
- Dry-aged steak develops unique nutty, buttery, and umami notes, creating a flavor profile that is unmatched by fresh cuts.
- Customizable Aging:
- Depending on the aging duration, you can achieve mild improvements in flavor (14–21 days) or bold, intense characteristics (30+ days).
Improved Texture and Tenderness
- Natural Enzyme Action:
- Enzymes break down muscle fibers and connective tissues, making the meat exceptionally tender.
- Melt-in-Your-Mouth Quality:
- Dry aging enhances the steak’s texture, resulting in a buttery, melt-in-your-mouth experience with each bite.
- Consistent Doneness:
- The aging process reduces water content, helping the steak cook more evenly.
A Gourmet Experience at Home
- Premium Quality:
- Dry-aged steak is considered a luxury item at steakhouses, and recreating it at home allows you to enjoy this gourmet experience at a fraction of the cost.
- Custom Control:
- You have full control over the cut, aging duration, and final preparation, ensuring a steak tailored to your preferences.
- Culinary Mastery:
- The process of dry aging and preparing the steak adds a sense of accomplishment and sophistication to your home cooking repertoire.
Dry aging steak at home offers unparalleled flavor, tenderness, and the satisfaction of crafting a premium dining experience without leaving your kitchen.
Potential Challenges and How to Overcome Them
Maintaining Proper Humidity and Temperature
- Challenge:
- Keeping the temperature within the ideal range of 34°F–38°F (1°C–3°C) and humidity at 80%–85% can be difficult, especially in DIY setups.
- Solution:
- Use a dedicated fridge or a specialized dry aging unit with built-in controls.
- Place a hygrometer and a digital thermometer inside the fridge to monitor conditions daily.
- Add a small fan for consistent airflow and a shallow pan of water or a humidifier to maintain proper humidity.
Preventing Mold or Spoilage
- Challenge:
- Mold and spoilage can occur if conditions are not correctly controlled or if contaminants are introduced.
- Solution:
- Start with Fresh, High-Quality Meat: Ensure the cut is free from contaminants before aging.
- Keep the Fridge Clean: Regularly sanitize the fridge or dry aging unit to minimize bacteria or mold.
- Inspect Daily: Watch for any unusual smells or spots of mold (white mold on the crust is harmless; black or green mold indicates spoilage and should be discarded).
Managing Time for Optimal Aging
- Challenge:
- Determining the right aging duration for your preferred flavor and texture can be tricky, as it varies based on personal taste.
- Solution:
- Plan Based on Flavor Goals:
- 14–21 Days: Mild improvement in tenderness and subtle flavor enhancement.
- 30+ Days: Bold, nutty, and complex flavors with a premium steakhouse quality.
- Use a calendar or log to track the start date and monitor progress.
- Start with shorter aging times and experiment with longer durations to discover your ideal taste profile.
- Plan Based on Flavor Goals:
By addressing these challenges with the right tools, vigilance, and planning, you can ensure a successful dry aging process that consistently produces exceptional steak.
Alternatives to Traditional Dry Aging
Wet Aging vs. Dry Aging
- Wet Aging:
- Process: Meat is vacuum-sealed in airtight plastic bags and aged in its natural juices.
- Flavor Profile: Produces a milder, slightly metallic taste compared to the intense, nutty flavors of dry aging.
- Advantages:
- Requires less space and specialized equipment.
- Shorter aging time (7–14 days).
- Disadvantages:
- Lacks the depth of flavor and improved texture associated with dry aging.
- Dry Aging:
- Process: Exposes meat to controlled air, allowing moisture evaporation and flavor concentration.
- Advantages:
- Delivers bold, complex flavors and tender texture.
- Disadvantages:
- Requires specific tools and a longer time commitment.
Using Dry Aging Bags
- What Are Dry Aging Bags?:
- Special vacuum-sealable bags that mimic the dry aging environment while protecting the meat from contamination.
- Benefits:
- Easier and safer for home use compared to traditional dry aging.
- Provides airflow while preventing bacteria and mold growth.
- How to Use:
- Place the meat in a dry aging bag, vacuum seal it, and store it on a rack in a refrigerator for 2–6 weeks.
- Results:
- Offers a similar texture and flavor to traditional dry aging with less risk and maintenance.
Quick Dry Aging Techniques
- Salt Aging:
- Coat the steak with kosher salt and let it rest uncovered in the refrigerator for 24–48 hours.
- Enhances tenderness and flavor, but lacks the full complexity of traditional dry aging.
- Sous Vide and Aging Combination:
- Use sous vide to mimic enzymatic reactions and then finish the steak with high-heat searing for added flavor.
- Reduces the aging time but sacrifices some of the depth of traditional dry aging.
- Flavor Enhancement Methods:
- Marinate steaks with umami-rich ingredients like soy sauce, Worcestershire sauce, or mushroom powder to mimic the nutty flavors of dry aging.
By exploring these alternatives, you can achieve varying levels of enhanced flavor and texture, even if traditional dry aging is not feasible. Each method offers unique advantages suited to different needs and skill levels.
How to Cook a Dry-Aged Steak
Preparing the Steak After Aging
- Trimming the Outer Layer:
- Use a sharp knife to remove the dried crust, fat, and any discolored areas from the steak.
- Trim carefully to preserve as much of the tender, aged meat as possible.
- Allow the Steak to Rest:
- Let the trimmed steak rest at room temperature for 30–60 minutes before cooking to ensure even cooking.
- Season Simply:
- Use kosher salt and freshly cracked black pepper to highlight the natural flavors of the dry-aged steak.
- Avoid heavy marinades or overpowering spices, as they can mask the rich, nutty flavor of the meat.
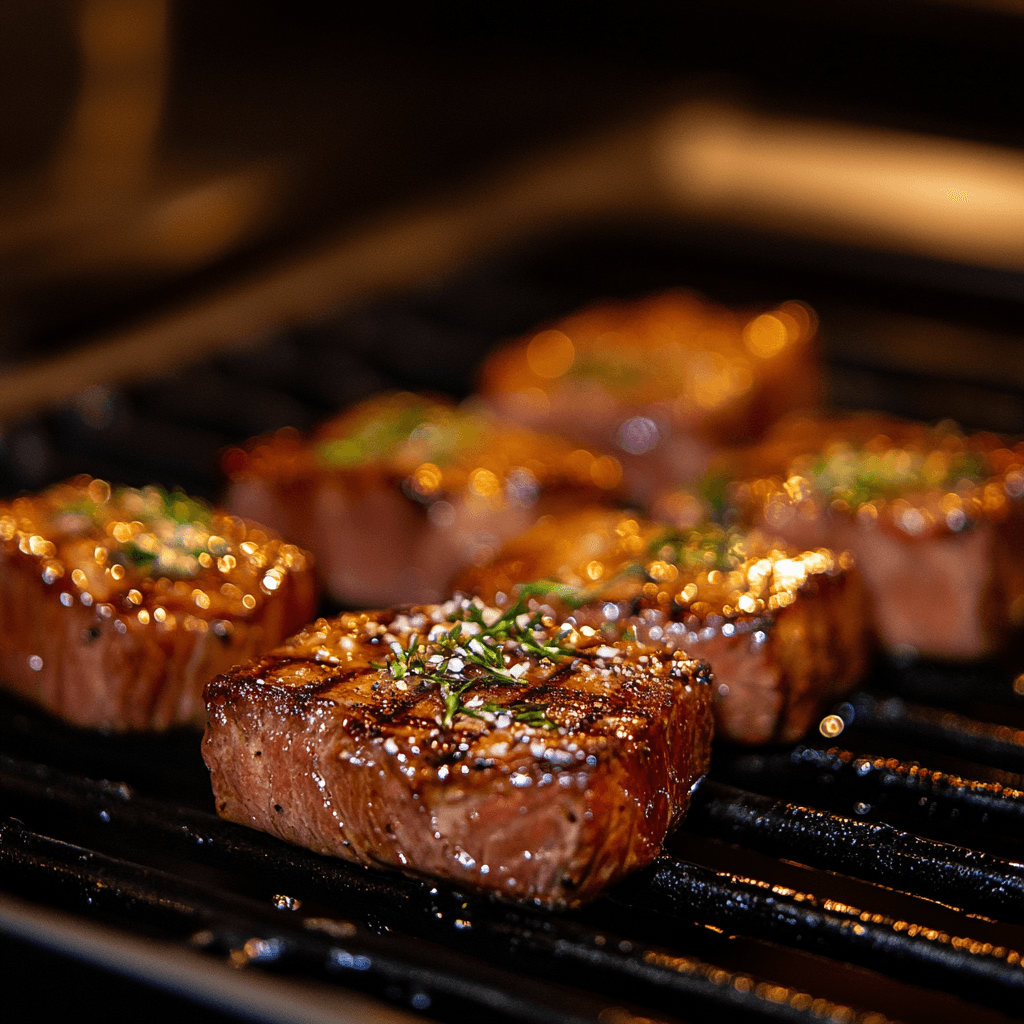
Best Cooking Methods for Dry-Aged Steak
- Pan-Searing:
- Heat a cast-iron skillet until smoking hot.
- Add a high-smoke-point oil (e.g., avocado oil) and sear the steak for 2–3 minutes per side.
- Finish with a knob of butter, garlic cloves, and fresh thyme, basting the steak for added richness.
- Grilling:
- Preheat the grill to high heat and oil the grates.
- Sear the steak directly over high heat for 2–3 minutes per side, then move to indirect heat to cook to the desired doneness.
- Reverse Searing:
- Cook the steak at a low temperature (225°F) in an oven or grill until it reaches 10°F below the target doneness.
- Finish with a high-heat sear on a skillet or grill for a perfect crust.
- Broiling:
- Place the steak on a wire rack set over a baking sheet.
- Broil on high for 3–5 minutes per side, keeping an eye on the crust to prevent burning.
Pairing Dry-Aged Steak with Sides and Sauces
- Classic Sides:
- Mashed Potatoes: Creamy and buttery, complementing the rich flavors of the steak.
- Grilled Vegetables: Asparagus, zucchini, or mushrooms add texture and earthy notes.
- Salads: A light mixed greens salad with vinaigrette balances the richness of the steak.
- Recommended Sauces:
- Red Wine Reduction: Enhances the nutty, umami flavors of the steak.
- Peppercorn Sauce: Adds a creamy, slightly spicy kick.
- Chimichurri: A fresh, tangy sauce that cuts through the richness.
- Beverage Pairings:
- Red Wine: Bold choices like Cabernet Sauvignon, Malbec, or Syrah.
- Craft Beers: Stouts or porters with rich, malty flavors.
By properly preparing, cooking, and pairing your dry-aged steak, you can create a gourmet dining experience that highlights the exceptional flavor and texture of this premium cut.
Frequently Asked Questions
How Long Should I Dry Age a Steak?
The aging duration depends on your flavor preference:
- 14–21 Days: Mildly aged, with improved tenderness and subtle flavor enhancements.
- 30–45 Days: Stronger nutty and buttery flavors with noticeable complexity.
- 60+ Days: Bold, intense flavors for true dry-aged enthusiasts.
Can I Dry Age Steak Without Specialized Equipment?
Yes, but it requires careful setup:
- Use a dedicated refrigerator to prevent contamination.
- Add a hygrometer and digital thermometer to maintain proper humidity and temperature (80%–85% humidity, 34°F–38°F).
- Dry aging bags are an excellent alternative for safety and ease.
What Are the Risks of Dry Aging at Home?
- Spoilage:
- Improper temperature or humidity can cause bacterial growth.
- Mold:
- While white mold is normal, black or green mold indicates spoilage.
- Cross-Contamination:
- Aging in a shared fridge increases the risk of contamination.
- Solution: Use a dedicated fridge or dry aging bag for safety.
How Can I Tell If the Steak Is Properly Aged?
- Appearance: The steak develops a dark, dry crust on the exterior.
- Smell: It should have a rich, earthy, nutty aroma. A sour or rotten smell indicates spoilage.
- Texture: Properly aged steak feels firm with visible marbling.
How Does Dry Aging Affect Nutritional Value?
- Protein: Enzymatic activity makes proteins more digestible.
- Fat: Dry aging doesn’t significantly alter fat content but enhances flavor.
- Moisture Loss: The meat loses water content, slightly concentrating nutrients like protein and minerals.
Is It Safe to Dry Age Steak in a Regular Refrigerator?
No, a regular refrigerator is not ideal:
- Temperature Fluctuations: Home fridges aren’t consistently cold enough (34°F–38°F).
- Humidity Control: Regular fridges lack humidity control, leading to excessive drying or spoilage.
- Cross-Contamination: Shared fridges can introduce odors and bacteria.
Can You Dry Age a Steak at Home?
Yes, with the right setup:
- Use a dedicated fridge or dry aging bags.
- Maintain precise temperature, humidity, and airflow.
- Monitor the meat regularly to ensure proper conditions.
Can I Dry Age Steak in My Fridge?
Technically, yes, but it’s risky:
- Use a spare fridge to avoid cross-contamination.
- Add a fan, thermometer, and humidity control tools.
- Aging in a standard fridge lacks the consistency of professional equipment.
How Do They Age Steak Without Spoiling?
- Controlled Conditions:
- Temperature: Kept consistently at 34°F–38°F to slow bacterial growth.
- Humidity: Maintained at 80%–85% to prevent excessive drying while discouraging spoilage.
- Airflow: Ensures moisture evaporation and inhibits harmful bacteria.
- Natural Enzymes:
- Break down proteins and fats, enhancing tenderness and flavor.
What Steaks Are Best for Dry Aging?
- Bone-In Ribeye: Retains moisture and flavor during the aging process.
- Strip Loin: Ideal for its even marbling and rich flavor development.
- Tenderloin: Benefits from enhanced tenderness, though it has a milder flavor profile.
- Porterhouse or T-Bone: Combines tenderloin and strip steak for a versatile cut.
Well-marbled, thick cuts are best for retaining flavor and texture during aging.
Tips for Success
Choosing High-Quality Meat
- Select Well-Marbled Cuts:
- Choose cuts like bone-in ribeye, strip loin, or porterhouse with visible marbling for superior flavor and tenderness.
- Thick cuts (2 inches or more) hold up better during the aging process.
- Source Fresh Meat:
- Purchase from reputable butchers or suppliers to ensure the meat is fresh and suitable for aging.
- Avoid pre-packaged cuts that have already been trimmed or frozen, as they may not age properly.
Keeping Your Setup Clean and Hygienic
- Use a Dedicated Space:
- Reserve a specific fridge or dry aging unit to avoid cross-contamination with other foods.
- Sanitize Regularly:
- Clean your fridge, racks, and tools before and after each aging session to minimize bacterial risks.
- Monitor Conditions:
- Check daily to ensure the temperature (34°F–38°F) and humidity (80%–85%) remain stable.
- Avoid opening the fridge unnecessarily to maintain consistency.
Patience Is Key for the Best Results
- Understand the Timeline:
- Aging for 14–21 days enhances tenderness and flavor subtly.
- Aging for 30–45 days develops deeper, nuttier flavors and richer textures.
- Longer aging (60+ days) produces bold, intense flavors, but may not suit all palates.
- Resist Rushing:
- Opening the fridge too often or trimming too early can compromise the process.
- Trust the Process:
- Dry aging requires time to allow enzymes to tenderize the meat and intensify its flavor. The wait is worth the reward.
By focusing on high-quality ingredients, maintaining a hygienic setup, and practicing patience, you can achieve exceptional dry aging results that rival any gourmet steakhouse.
Conclusion and Final Thoughts
Why You Should Try Dry Aging Steak at Home
Dry aging steak at home can take your cooking to the next level. It enhances the flavor and tenderness of the meat, offering a rich, complex taste that can’t be found in store-bought steaks. With just a little patience and the right setup, you can enjoy restaurant-quality steak in the comfort of your home. The process allows you to experiment with different cuts and aging times to achieve the perfect steak tailored to your preferences.
Encouragement to Experiment with Flavors and Techniques
Don’t be afraid to experiment with different flavors and techniques while dry aging your steak. Try adding herbs, spices, or even experimenting with different aging periods to discover new dimensions in taste. The more you experiment, the more you’ll refine your technique and develop your own signature style. Whether you’re a seasoned chef or a home cook, dry aging can be a fun and rewarding culinary adventure.


